So, I just had some guy mention that if I enable Location Sharing within Google Maps, I might actually be able to get exactly what I'm looking for. I think I'll head over and hunt down some instructions now so I can give it a shot and see if it works.
It honestly feels quite unsettling to think about—for instance, if you were to lose your phone or have it snatched right out of your hand, and then some stranger happens to see that notification indicating the device is being tracked via GPS. I recall stumbling upon an article somewhere mentioning that there’s actually a way to disable this feature entirely, but for the life of me, I simply cannot seem to locate the setting in the menus right now. Shit
I’ve been testing out the Google "Find My Device" service, and whenever I pull up the page on my laptop, it successfully shows me exactly where my phone is located. The thing is, every single time I do this, my phone starts blaring a notification sound accompanied by the message "device located" Is there any way at all to stop that specific text notification from popping up? I tried to google it, and while I found plenty of forums and troubleshooting threads regarding this exact issue, everything seems to be outdated and specifically tailored toward older versions of the operating system—but I’m running Android 12.
Something feels a bit off here. I decided to head over to whatismyIP to check my connection, and this is what popped up on my screen: My Public IPv4 is: 93.140.232.180 My Public IPv6 is: Not Detected My IP Location is: Malibu, 17 US My ISP is: AT&T
I’m a little perplexed—why isn't it showing an Internet Protocol address? Furthermore, it claims my location is Malibu, yet I am actually sitting right here in San Francisco . I must admit, I find this quite confusing
fadedorca66 said:I guess why didn't you just partition it during the initial setup? That's how most people handle it, and honestly, messing with partition sizes later on is usually more trouble than it's worth...
Well, if all that is considered "undesirable," then what on earth is the point of having these specialized partition management tools at our disposal?
Alright, I've decided to assign the letter D: to this second partition. I’ve gone ahead and capped my Recycle Bin at 5GB. I figured it was about time I took some control over my storage habits! I find myself quite perplexed by this particular situation, and I must admit, it’s left me feeling a bit stumped! It seems I am running into a rather stubborn limitation while trying to manage my drive partitions. Specifically, I was hoping to allocate exactly 100 GB to my C: drive—just a nice, round, sensible number, wouldn't you agree?—but for some reason, the system refuses to cooperate. Instead of allowing that specific size, it insists on offering me a minimum of 121 GB. It feels a bit like trying to order a single scoop of ice cream only to be told the smallest serving available is a massive triple scoop! Has anyone else encountered this sort of quirk? I can't quite wrap my head around why it won't let me set a more precise limit. Any insights would be sincerely appreciated!
I find myself in a bit of a predicament, and frankly, it’s quite vexing. My Dell keyboard—which, I should add, I've always been quite fond of for its tactile response—has developed this incredibly frustrating habit where the spacebar simply sticks. It’s one of those small, seemingly trivial hardware issues that somehow manages to derail an entire afternoon of productivity. Every time I attempt to type a sentence, there’s that momentary, agonizing pause as the key refuses to pop back up. It makes me feel rather clumsy, as if my own typing rhythm is being sabotaged by a tiny piece of plastic. I’ve tried the usual suspects—blowing air under the keycap, perhaps a bit too enthusiastically, I might admit—but no luck so far. Has anyone else dealt with this specific nuisance? I’m wondering if it’s just a stray crumb from a snack (guilty as charged, I suppose) or if there's some deeper mechanical failure occurring within the switch itself. If you have any advice on how to remedy this without having to go out and purchase an entirely new peripheral, I would be immensely grateful. I truly do hate wasting perfectly good equipment.
I find myself quite perplexed by this issue, especially considering I’m working with a brand-new hard drive that I picked up just two days ago and used to install Windows 10
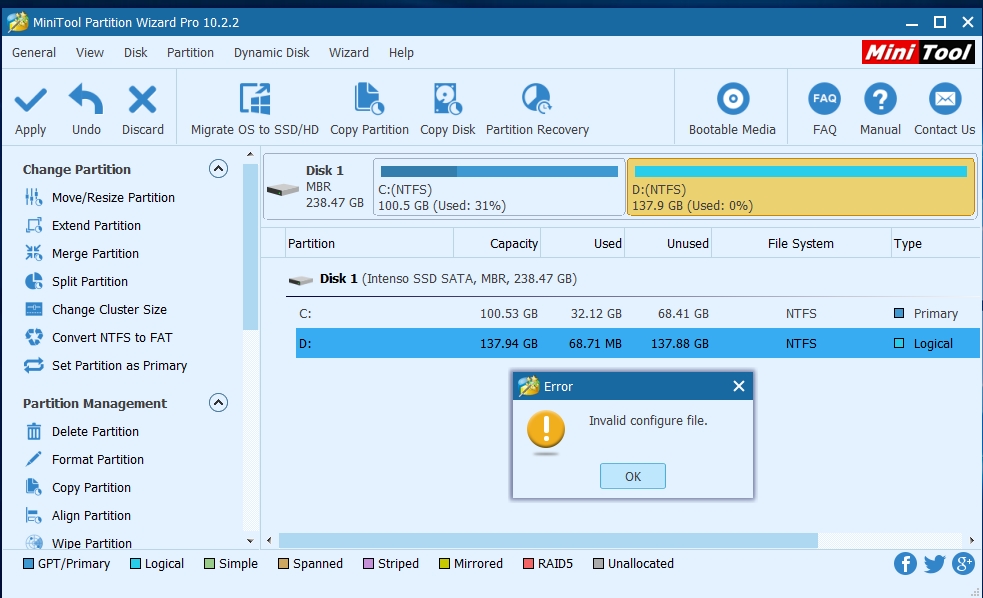
I am honestly at a complete loss here; I simply cannot get this to work, which is incredibly frustrating because I have successfully resized partitions on five or six other laptops without a single hiccup. On my current machine, I’m looking at a C: drive with 90 GB and a D: drive with 150 GB, both running the exact same version of Windows. I attempted to resolve this using MiniTool Partition Wizard, but it just refuses to cooperate. My plan was quite straightforward: expand the C: drive to 100 GB and let the D: drive occupy whatever space remains. I have attached an image below showing exactly what happens immediately after I click the Apply button. open source screen capture
Well, I am going to attempt to tackle this using a specific utility I have on hand—I've got MiniTool Partition Wizard installed, and I am sincerely hoping that it might be capable of handling the task at hand.
My brother has been running a laptop with a 60 GB C: partition dedicated to Windows 10, and honestly, it’s been performing flawlessly for over five years now. The reason I’m so adamant about having two separate partitions is quite simple: if the operating system ever hits a snag and requires a complete reinstall, I want to ensure my precious data on the D: partition remains perfectly safe and untouched.
I’m having a bit of trouble following your logic when you suggest, "Well, just create a new partition (set the size and format it)." How exactly am I supposed to go about creating one if the shrink volume feature isn't even working for me? If you wouldn't mind, could you please elaborate on that process? It would be a huge help. By the way, is 80 GB really considered enough for Windows 10? My notes suggest that somewhere between 60 and 100 GB is the sweet spot for smooth, everyday operation.
coppersailor28 said:Try running a disk defrag, though I doubt you'll see much of an improvement.
'Size of available shrink space in MB: 121000' means you're stuck with 'only about' 121 GB of actual shrinkable space. There's some locked, unmovable file sitting right on that boundary holding everything up.
I find myself pondering a rather curious question today, one that seems almost trivial on the surface but actually touches upon the very fundamentals of how our hardware interacts with software. Why on earth would anyone bother with defragmentation immediately after a fresh installation of Windows 10? I mean, think about it—you've just gone through the whole ordeal of formatting the drive, everything is wiped clean, the OS is freshly installed, and you haven't even had the chance to install a single program yet. It feels somewhat redundant, doesn't it? Almost like cleaning a house that was just built from the ground up! I would love to hear your thoughts on this particular logic.
I just finished installing Windows 10 (Home), and my very first order of business was wanting to split my hard drive into two separate partitions. The drive itself is about 244 GB, and my plan was to set the C: drive to roughly 80 GB and leave the remaining 160 GB for a D: drive. So, I opened up Disk Management within Windows 10 and selected the shrink volume option, but then this popped up on my screen: Total size before shrink in MB: 244000 Size of available shrink space in MB: 121000 Enter the amount of space to shrink in MB 121000 Total size after shrink In MB: 122000
Now, from what I can gather, the field labeled "Enter the amount of space to shrink in MB" is where I should be inputting the desired size for my new D: partition. However, the system simply refuses to accept anything greater than 121000. On My PC, it shows that I've only used about 20 GB, which means there should be plenty of room—roughly 220 GB—to work with. Does anyone happen to know why it won't let me enter a larger number when there clearly seems to be enough free space?
I’ve recently upgraded my hardware situation; I was running an older laptop, but I finally treated myself to a much more powerful machine with a significantly better processor and more RAM. My heart is set on having my entire digital environment—every single setting, file, and application—mirrored perfectly on this new device, yet I am quite desperate to avoid the tedious, soul-crushing process of reinstalling macOS and all my various software packages from scratch. Now, I find myself wondering if there exists a specific utility or specialized software capable of migrating my existing macOS installations, system drivers, and all my installed programs directly from the old laptop over to the new one?
When one considers tools like the YouTube downloader, or perhaps the YouTube downloader specifically known as YouTube downloader, and so on, and so forth...
I mean, if it isn’t meant for downloading, then what on earth is the point of YouTube anyway? Up until now, I’ve successfully downloaded what feels like a million music videos from there—both MP4 and MP3 formats—without a single hiccup. But that’s exactly why I’m turning to you all for a bit of guidance; for some reason, this time around, it just refuses to download.
Look, Mr. Thompson, I am well aware of that direct recording method you mentioned, but frankly, that isn't quite my style; I would much rather just download the video directly as an MP3 file.
I happened to stumble upon this YouTube link featuring some truly wonderful relaxing music presented in a video format, but I am quite keen on downloading the audio as an MP3 instead. I have already attempted to use about ten different YouTube converter tools, but I’ve had absolutely no luck whatsoever; every single one of them simply returns some sort of error message. Does anyone happen to know a reliable way to get this downloaded?
 I find myself in a bit of a predicament, and frankly, it’s quite vexing. My Dell keyboard—which, I should add, I've always been quite fond of for its tactile response—has developed this incredibly frustrating habit where the spacebar simply sticks. It’s one of those small, seemingly trivial hardware issues that somehow manages to derail an entire afternoon of productivity. Every time I attempt to type a sentence, there’s that momentary, agonizing pause as the key refuses to pop back up. It makes me feel rather clumsy, as if my own typing rhythm is being sabotaged by a tiny piece of plastic. I’ve tried the usual suspects—blowing air under the keycap, perhaps a bit too enthusiastically, I might admit—but no luck so far. Has anyone else dealt with this specific nuisance? I’m wondering if it’s just a stray crumb from a snack (guilty as charged, I suppose) or if there's some deeper mechanical failure occurring within the switch itself. If you have any advice on how to remedy this without having to go out and purchase an entirely new peripheral, I would be immensely grateful. I truly do hate wasting perfectly good equipment.
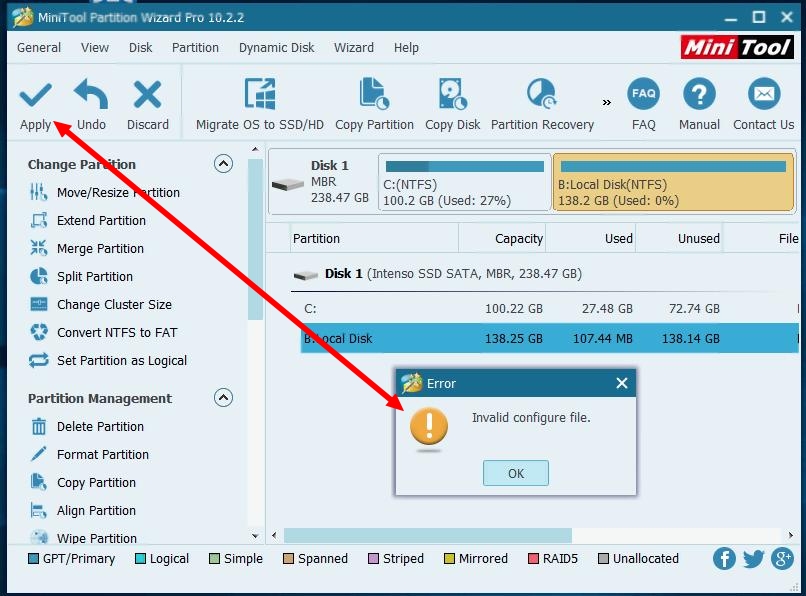 open source screen capture